Firmware Flashing Tool
Before We Proceed
Note
- Make sure you have a data transfer cable ready, as it is required for the flashing process.
- Ensure your camera is properly set up: How to prepare a Seeed Studio XIAO Sense ESP32.
Flash Firmware
Step 1: Download and Install the Firmware Flashing Tool
- Download the Firmware Flashing Tool Installer from the latest GitHub release.
- Run the installer and follow the on-screen instructions to complete the installation of the Firmware Flashing Tool application.
Step 2: Run the Firmware Flashing Tool
After installation, double-click the desktop icon to open the application.
You should see a GUI similar to this:
Step 3: Select Board
Click the Select Board dropdown and choose your board from the list.
Once selected, click Next to continue.

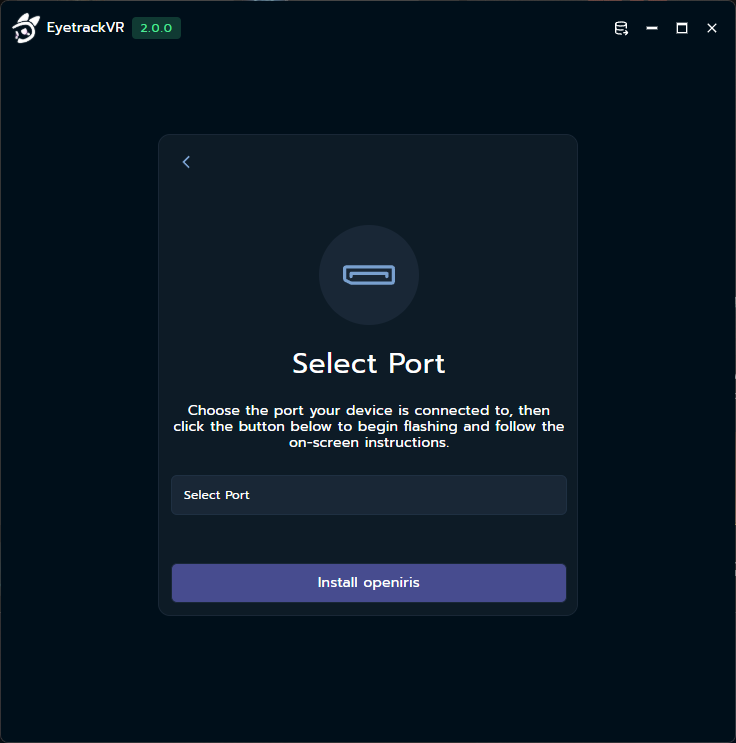
Step 4: Select Port
Click the Select port dropdown, choose the port your board is connected to (e.g., COM3), then click Install Openiris to start the flashing process.
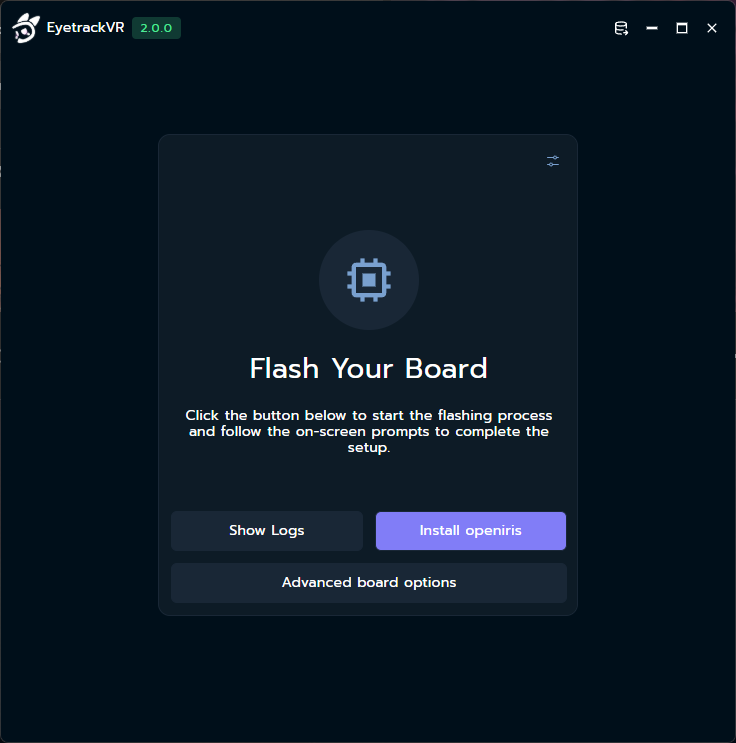
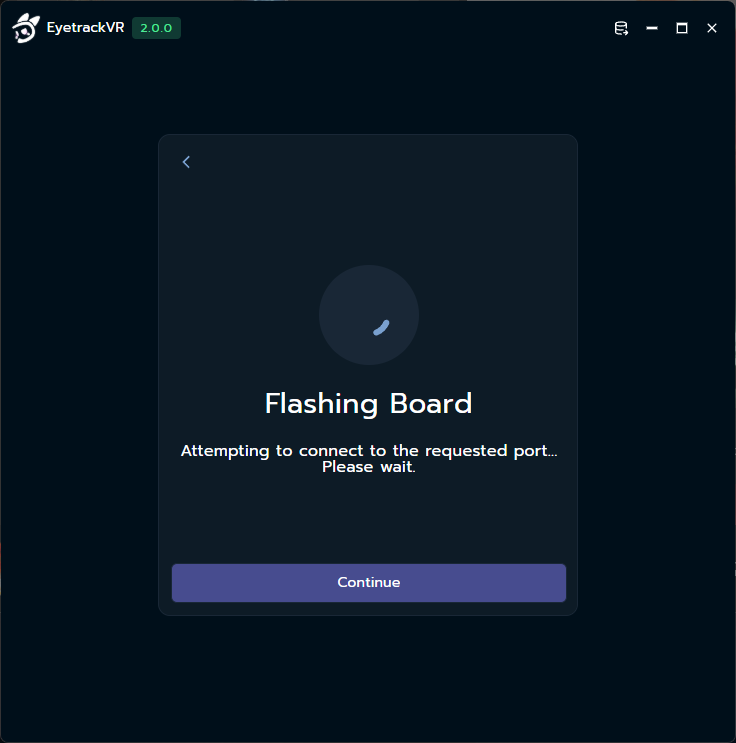
Step 5: Installation
If the correct board and port are selected, the flashing process will begin automatically.
No action is required during this step.
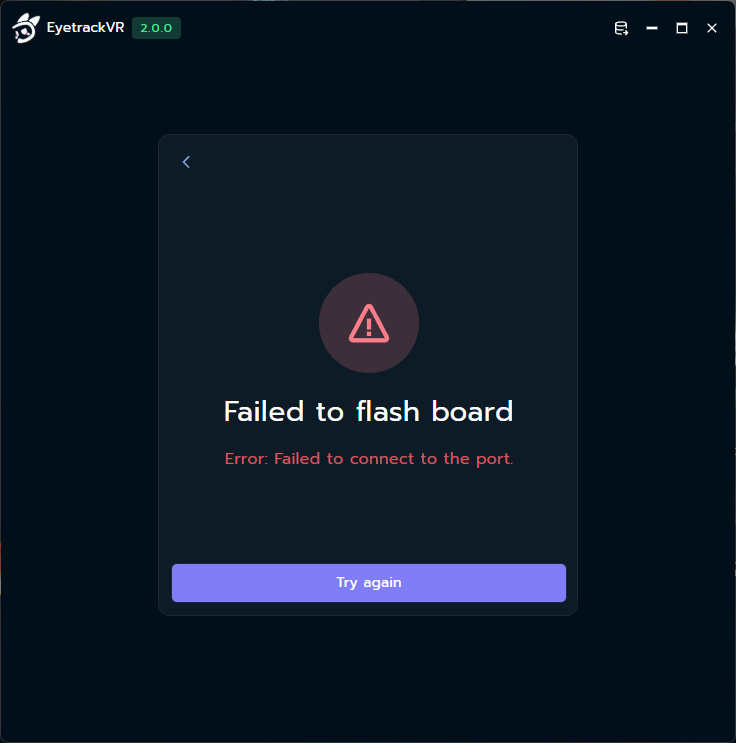
Troubleshooting
If flashing fails, check the following:
- Verify that the correct port is selected.
- If your board has a Boot (B) button, press and hold it.
- Ensure your data transfer cable is connected properly.
- Confirm that your camera is correctly set up: Preparing Seeed Studio XIAO Sense ESP32.
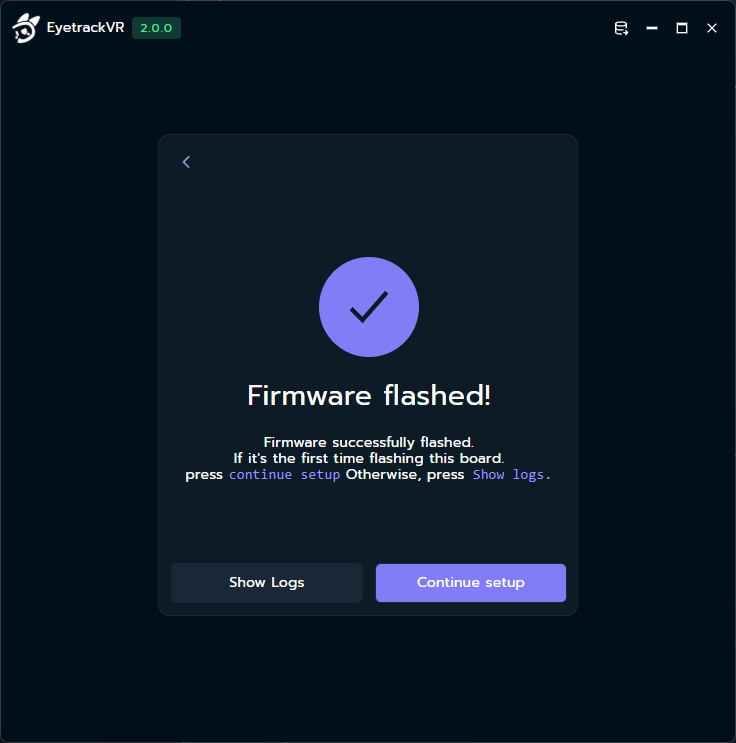
That's all
Once the process finishes successfully, you will see Firmware flashed!.
Click Continue setup to configure your board in wired or wireless mode.
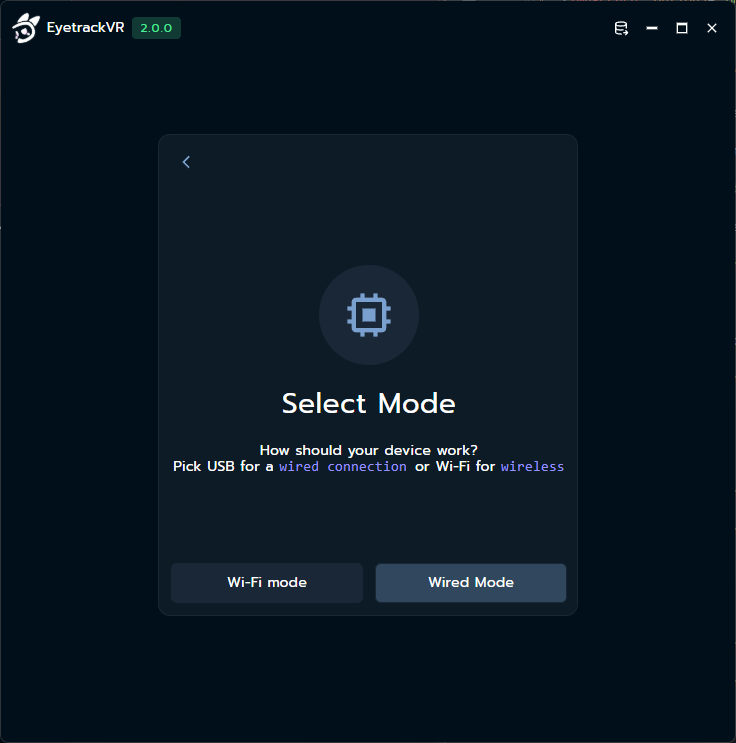
Wired Mode
To use your board in wired mode, simply click Wired mode.
Step 1: Setup Tracker Name
Enter a custom name for your tracker. This name will identify your device.
Click Setup tracker to complete the setup.
Step 2: That's all
Your board is now set up and ready to use in wired mode.
Wireless Mode
Step 1: Select Wireless Mode
Click Wi-Fi mode to use your board wirelessly.
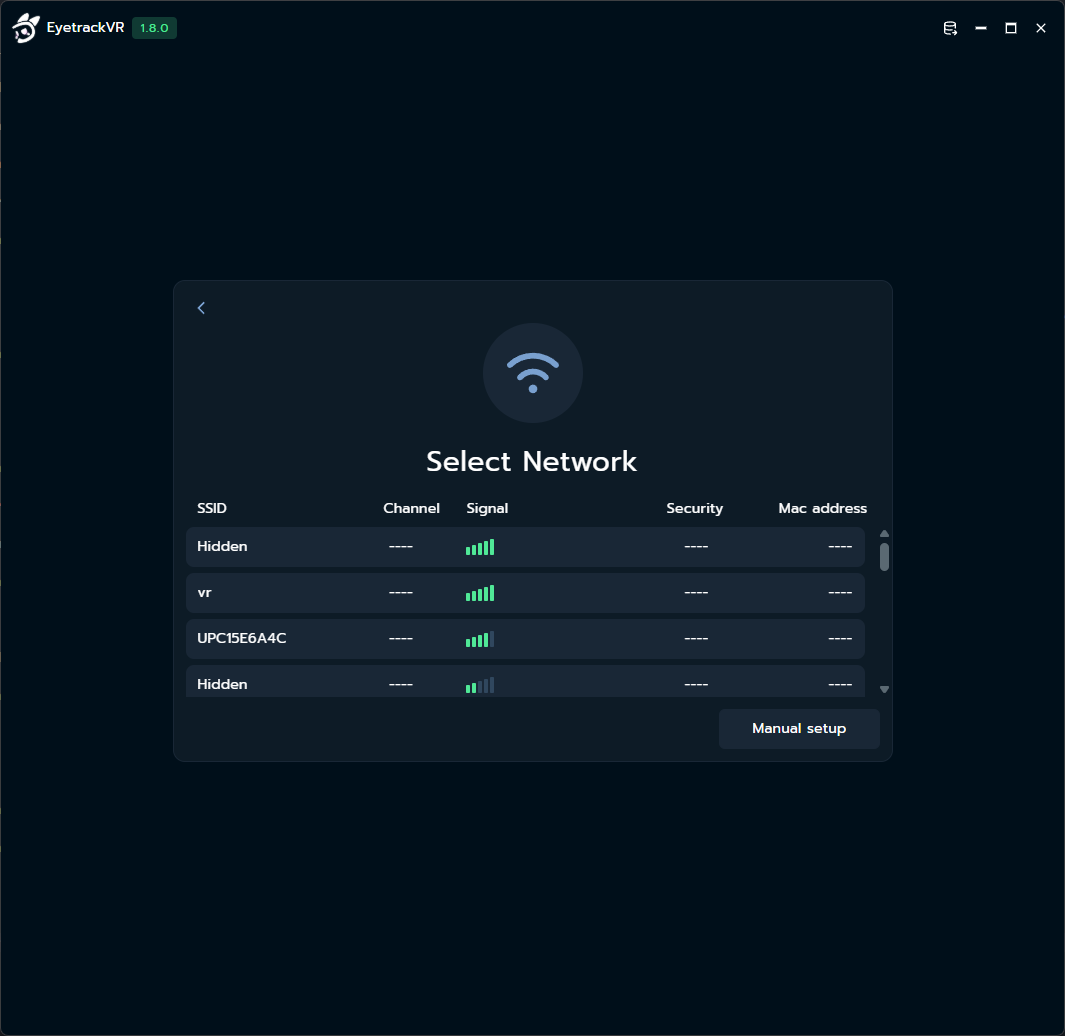
Step 2: Select Network
Choose a network from the list.
If your network is not listed, click Manual setup to enter the details manually.
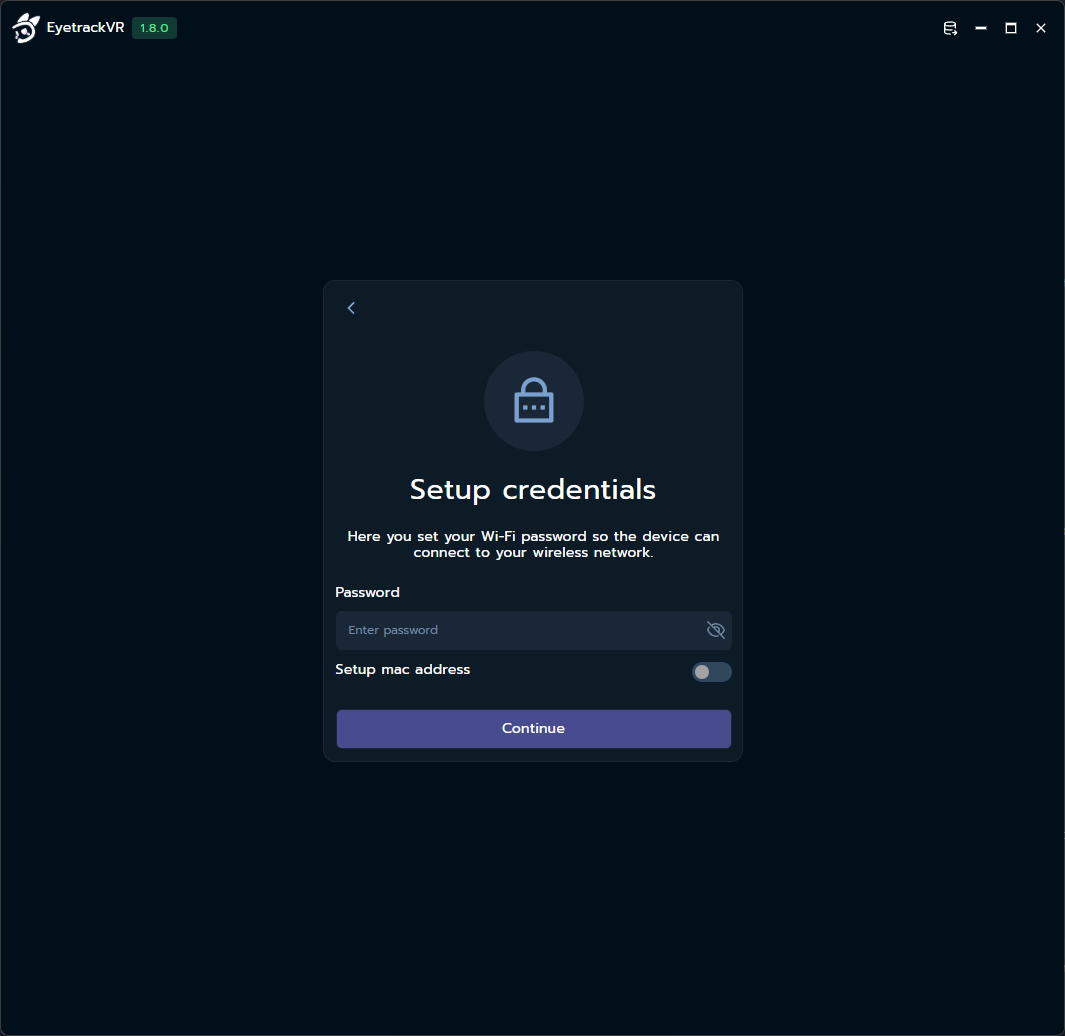
Step 3: Enter Credentials
Enter the password for the selected network, check for errors, and click Continue.
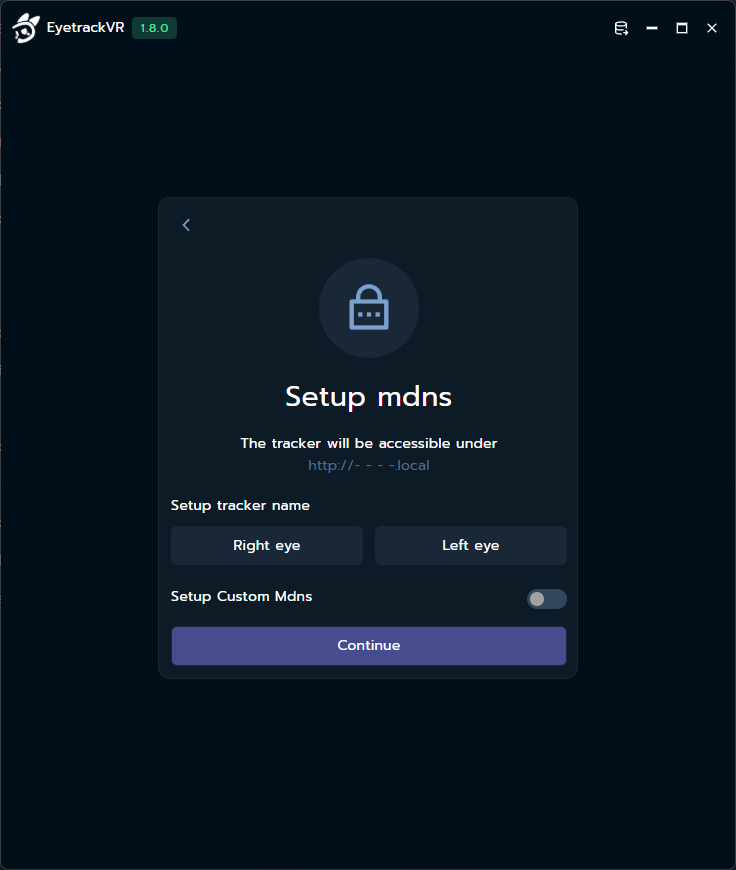
Step 4: Configure mDNS
Set the name under which your board will appear on the network.
To use a custom name, select Setup custom mdns and enter your preferred name.
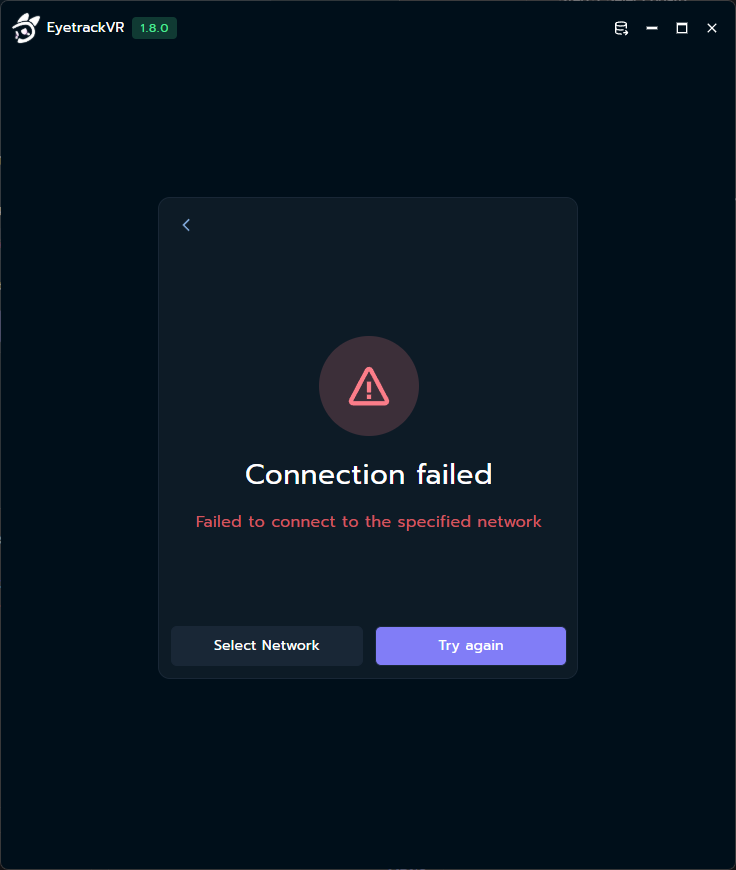
Step 5: Connection Process
If the network and credentials are correct, the connection will start automatically.
No further action is required during this step.
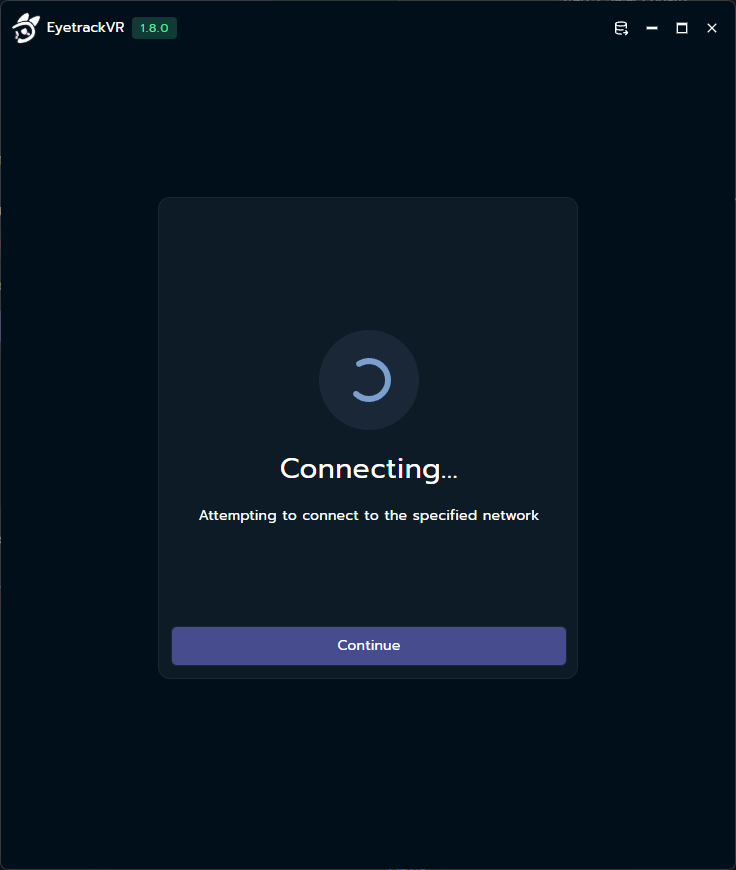
If the connection fails, double-check your credentials and try again.
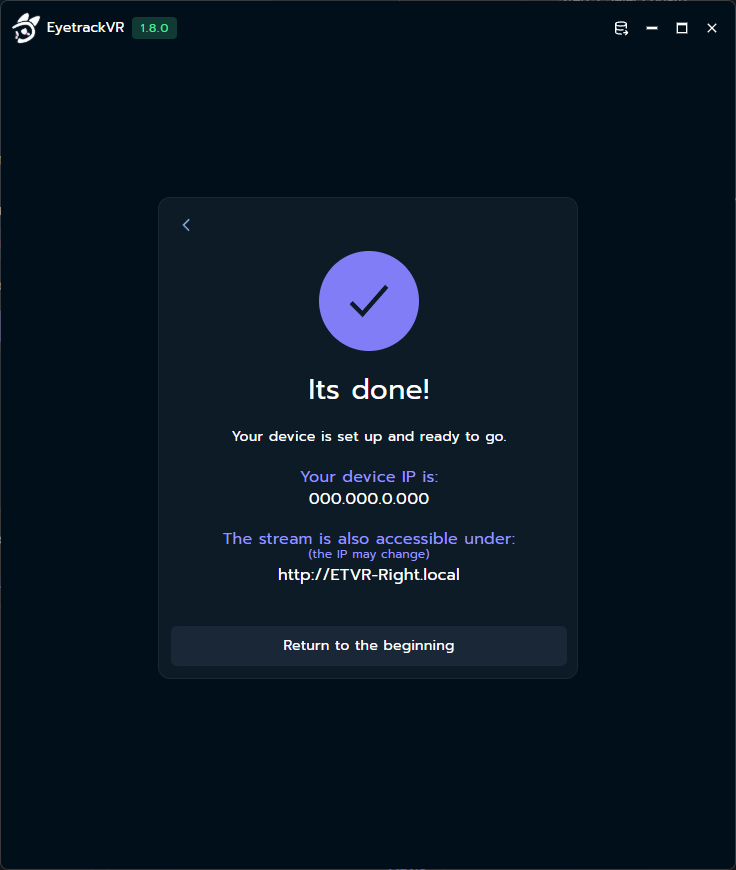
Step 6: That's all
Your board is now connected to the network and ready to use in wireless mode.